How to Create a Sleek Bun for Thick Hair Without Heat
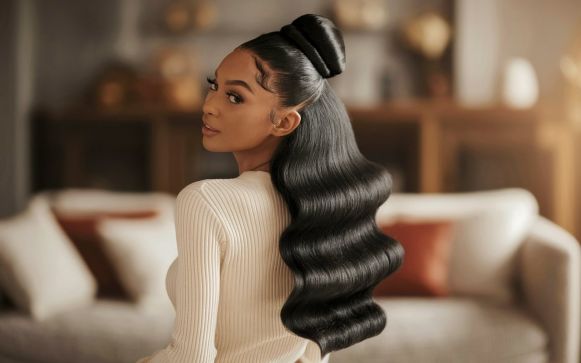
Taming thick hair without heat can feel impossible. But with the right method you can master it. Creating a sleek bun without heat helps maintain healthy strands. You avoid damage while looking polished. This guide shows you how to get a smooth bun using only basic tools.
Why Go Heatless for Sleek Buns
Heat tools can damage thick hair over time. High temperatures weaken your strands. This leads to breakage and split ends. A heatless bun keeps your hair strong. It also reduces frizz and helps your natural texture shine. Plus it saves time and energy.
What You Need to Create a Sleek Bun Without Heat
Gather these tools before starting. Each plays a key role in keeping the bun sleek.
H3: Essential Tools
- Boar bristle brush or smoothing brush
- Strong hold gel or edge control
- Water spray bottle
- Wide-tooth comb
- Hair tie
- Hair pins
- Satin or silk scarf
These items are affordable. You likely already have most at home. They help smooth thick hair without heat.
Step-by-Step Guide to a Sleek Bun Without Heat
Follow these steps to create a bun that stays all day. You do not need a blow dryer or flat iron.
H3: Step 1 – Start With Damp Hair
Use a spray bottle to dampen your hair. Do not soak it. Slight moisture helps with control. It also sets the style better. If your hair is freshly washed let it air dry about 80 percent first.
H3: Step 2 – Detangle and Smooth
Use a wide-tooth comb to detangle your hair. Remove all knots and tangles gently. After that use a boar bristle brush. It helps smooth the outer layer. Always brush in the direction you want your bun.
H3: Step 3 – Apply Styling Product
Use gel or edge control. Apply it evenly on the surface of your hair. Focus on the crown and sides. This creates that sleek finish. You can also apply a little at the nape.
H3: Step 4 – Gather Into a Ponytail
Pull your hair into a high or low ponytail. Secure it tightly with a strong hair tie. Make sure no bumps show. Use the smoothing brush again to polish the surface.
H3: Step 5 – Twist and Wrap
Twist the ponytail section. Wrap it around the base to form the bun. Tuck the ends under and pin with hairpins. Adjust until the bun feels firm.
H3: Step 6 – Set the Look
Tie a silk scarf over your head. Keep it on for 10 to 20 minutes. This helps lock the style. It flattens flyaways and holds everything in place.
H2: Sleek Bun Styles for Thick Hair
A sleek bun can be simple or styled. Here are a few heat-free ideas for thick hair.
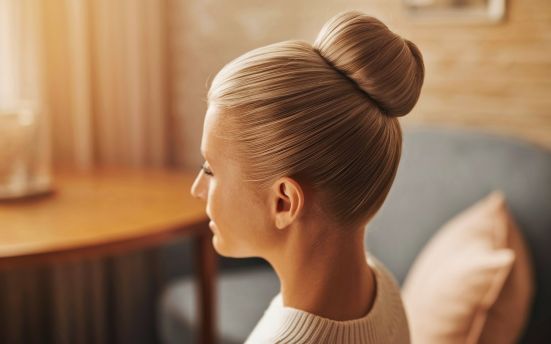
H3: High Sleek Bun
Pull your hair up towards the crown. Great for sharp jawlines. Ideal for hot days.
H3: Low Sleek Bun
Style the bun at the nape. Best for formal events or work. Keeps hair off your face gently.
H3: Side Sleek Bun
Create the bun behind one ear. Adds a romantic soft vibe. Works well with braids or waves.
H3: Center-Part Sleek Bun
Part your hair down the middle. Pull it into a low sleek bun. Gives a balanced structured look.
H3: Braided Sleek Bun
Braid the ponytail before forming a bun. Adds texture. Looks intricate without much work.
H2: Tips for Long Lasting Sleek Buns Without Heat
Use these tricks to keep your bun fresh all day. No heat required.
H4: Use the Right Gel
Choose a gel that works for your hair type. For thick hair use strong hold formulas. Alcohol-free is better for moisture.
H4: Brush Before Every Step
Brush before applying gel. Brush again after tying the ponytail. This ensures the smoothest surface.
H4: Use a Silk Scarf Overnight
To preserve your bun overnight wrap it in silk. It prevents frizz and keeps it sleek.
H4: Avoid Heavy Oils
Oils can make the bun slip out of place. Use lightweight serums if needed. Stick to water-based products for control.
H4: Reapply Edge Control Midday
Touch up your edges during the day. It keeps the front looking fresh. You stay polished from morning till night.
H2: Benefits of a Heat-Free Sleek Bun
There are many upsides to skipping heat. Here is why you should do it more often.
H4: Healthier Hair
No heat means no damage. Your hair stays strong and thick. Ends stay sealed.
H4: Faster Routine
You save time. No need to wait for flat irons to heat up. You get ready quickly.
H4: Budget Friendly
No heat tools mean no extra costs. You only use simple products. It saves money over time.
H4: Protective Style
A sleek bun protects ends from breakage. It prevents tangles and moisture loss.
H2: Pros and Cons of Sleek Bun Without Heat
| Pros | Cons |
|---|---|
| No heat damage | May not last as long as heat styles |
| Quick and simple | Can be tricky for very coarse hair |
| Cost-effective | Requires strong gel and scarf |
| Maintains hair health | Needs daily touch-ups |
| Works for any occasion | May need practice to perfect |
H2: Common Mistakes to Avoid
Avoid these errors for the perfect sleek bun every time.
H4: Skipping the Detangling
Thick hair needs to be fully detangled. Skipping this leads to bumps and breakage.
H4: Using Too Much Product
Too much gel causes flakes. Use a small amount. Build it gradually if needed.
H4: Not Securing the Bun
Use enough pins. A loose bun will fall. Always tuck ends tightly.
H4: Forgetting to Set with Scarf
The scarf step seals the style. Skipping it causes frizz.
H4: Styling Dry Hair
Dry hair resists shaping. Use light moisture for better control.
H2: Natural Hair and Sleek Buns
Thick natural hair can rock sleek buns too. It needs extra moisture and hold. Try leave-in conditioner first. Then apply a strong gel. Use the scarf method to lay everything flat. With practice natural textures stay just as sleek.
H2: Sleek Bun Myths
There are myths about sleek buns that confuse people. Let’s clear them up.
H4: You Need Heat to Look Polished
Wrong. With the right tools you can look sleek without any heat at all.
H4: Only Straight Hair Can Be Sleek
False. Curls and coils can also be sleek. It depends on your method not your texture.
H4: Gel Damages Hair
Not true if used properly. Choose alcohol-free formulas. Wash it out weekly.
H4: Sleek Buns Cause Hair Loss
Only tight buns damage hair. Loose but firm buns are safe.
H2: Sleek Bun Maintenance Tips
Once you’ve created the perfect bun keep it neat. Maintenance is easy if you do it daily.
H4: Wrap Hair at Night
Use a silk or satin scarf every night. This prevents friction and keeps the bun flat.
H4: Refresh in the Morning
Spray water and reapply a tiny amount of gel. Brush lightly. That revives the sleek look.
H4: Wash Product Build-up
After a few days wash your hair. Too much product causes flakes and clogging.
H2: Try More Sleek Styles
Explore more styles at SleekBun. Learn sleek buns for all occasions. See trending looks. Find tools that help with thick hair.
FAQs About Sleek Buns Without Heat
H3: How long does a no-heat sleek bun last?
It can last one to three days. Use a scarf and touch-up gel to extend wear.
H3: What gel works best for thick hair?
Choose a strong hold gel. Look for alcohol-free formulas. Eco Styler and Shine ‘n Jam work well.
H3: Can I do a sleek bun on natural hair?
Yes. Apply leave-in conditioner. Use edge control and wrap with a silk scarf.
H3: Do I need to wet my hair every time?
Light dampening helps. It makes shaping easier. Avoid soaking your hair daily.
H3: Is a sleek bun good for workouts?
Yes. It holds hair in place. Use extra pins and gel for better hold.

3 Comments