Affordable Sleek Bun Styling Kit for Beginners

Creating a sleek bun does not need expensive tools. You can achieve salon-level results using budget-friendly products. A simple and effective kit is perfect for beginners who want stunning hairstyles at home. This guide shows how to build your own affordable sleek bun styling kit without spending too much.
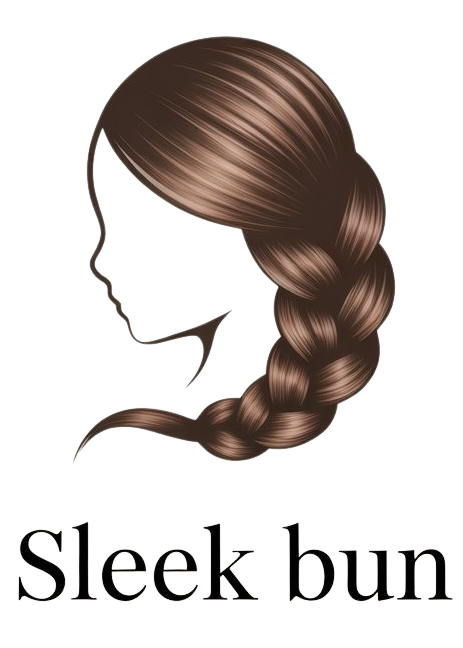
Why Sleek Buns Are Perfect for Beginners
Sleek buns are easy to style. They work for every hair type and are ideal for all occasions. Whether you are going to school or work or attending events they keep hair in place all day. You do not need professional training to create a sleek look. A little practice with the right tools is enough.
What Makes a Sleek Bun Look Perfect
A sleek bun needs smooth edges. It needs strong hold. It should look neat from all angles. The right products help reduce frizz and add shine. You must use the correct brush gel and styling accessories. Your kit should support daily use without damaging your hair.
Essential Items for an Affordable Sleek Bun Kit
H2: Hair Brush With Firm Bristles
You need a strong brush to smooth your hair. Choose one with boar bristles or nylon. These help distribute natural oils evenly. They also flatten flyaways. A good brush gives you a sleek finish with less effort.
H2: Styling Gel or Edge Control
Styling gel holds your hair in place. Choose a non-flaky formula that provides long-lasting hold. Edge control products define your baby hairs. They create a clean and polished hairline.
H2: Hair Ties and Bobby Pins
Use snag-free hair ties to avoid breakage. Secure your bun with pins to keep it firm all day. Black or brown pins blend well with most hair colors. You can also use U-pins for thicker buns.
H2: Hair Comb or Rat Tail Comb
A rat tail comb helps in parting your hair perfectly. It is also useful for shaping and smoothing edges. The pointed end creates clean lines for center or side parts.
H2: Satin or Silk Scarf
Wrap a scarf over your bun for ten minutes. It sets the style and controls frizz. Satin protects your hair and keeps it flat. It is a must-have for long-lasting sleek looks.
H2: Shine Spray or Oil
Use a shine spray for a glossy finish. You can also use lightweight oil like argan or jojoba. It adds moisture and makes your hair look healthy. Just a few drops go a long way.
H3: Building Your Kit for Less Than $25
You can buy affordable products online or at local stores. Many drugstore brands offer quality gels and brushes. You do not need to buy everything at once. Start with basics and build slowly. Keep looking for discounts and value packs.
| Product | Approx Price | Recommendation |
|---|---|---|
| Bristle Brush | $5 | Use for smoothing hair |
| Styling Gel | $4 | Choose strong hold formula |
| Hair Ties and Pins | $3 | Get assorted pack |
| Rat Tail Comb | $2 | Great for parting and edges |
| Satin Scarf | $6 | Helps set your bun |
| Shine Spray or Oil | $4 | Adds final glossy finish |
| Total | $24 | Budget-friendly and complete |
H2: Pros and Cons of Affordable Sleek Bun Kits
| Pros | Cons |
|---|---|
| Budget friendly | May not include premium products |
| Beginner friendly tools | Some gels can flake or dry fast |
| Easy to carry and store | Brushes may wear out quickly |
| Available in local shops and online | May require regular product refill |
| Can work for multiple hairstyles | May not suit extremely curly hair |
H3: How to Use the Kit Step by Step
H4: Step 1: Detangle and Prep Your Hair
Start with dry or slightly damp hair. Use the bristle brush to detangle gently. Apply a small amount of oil if needed. This reduces frizz and adds smoothness.
H4: Step 2: Part Your Hair
Use the rat tail comb to create a middle or side part. Make sure the line is clean. Brush both sides to flatten the roots.
H4: Step 3: Apply Gel
Apply styling gel on the top and sides. Smooth it using your brush. Cover all flyaways and edges. You can add a bit more gel near your neck area.
H4: Step 4: Make the Bun
Pull your hair into a low ponytail. Twist it into a bun shape. Secure it with pins. Make sure it feels tight but not painful.
H4: Step 5: Lay Edges and Set
Use edge control and the tail of your comb to design baby hairs. Wrap your scarf and wait for ten minutes. Remove the scarf and spray some shine.
H2: Where to Find These Kits Online
Many online stores offer styling kits for low prices. You can also build your own from individual items. Choose trusted sellers with good reviews. Check out SleekBun for trendy styles and detailed guides. They provide tips and product suggestions that fit any budget.
H2: Tips to Maintain Your Styling Tools
Clean your brush once a week. Remove hair strands and rinse with shampoo. Wash your scarf often to avoid buildup. Store pins in a small box. Keep your products sealed after every use.
H2: Benefits of DIY Sleek Bun Kits
You save money. You learn hairstyling at home. You build your confidence. Your hair stays healthy. You gain control over products used. You avoid chemicals in salon products.
H3: Sleek Bun Styles You Can Try With This Kit
H4: Classic Low Bun
Perfect for work and school. Simple and polished. Needs very few accessories.
H4: Middle Part Sleek Bun
Trendy and popular. Great for events and photos. Works best with strong hold gel.
H4: Sleek Bun With Braided Edges
Add thin braids on each side before tying the bun. Gives extra detail and texture.
H4: Sleek Bun With Accessories
Use hair cuffs or pearl pins for a glam look. Match with outfits for special occasions.
H2: Common Mistakes Beginners Should Avoid
Do not apply too much gel. It can cause flakes. Do not pull your hair too tight. It can lead to breakage. Avoid using dirty brushes. They can irritate your scalp. Do not skip the scarf step. It helps set your style better.
H2: Why Budget Does Not Mean Low Quality
Affordable does not mean poor results. Many budget products are made for daily use. They offer great performance. You just need to know what works best for your hair type. Mixing and matching brands can help build a perfect kit.
H2: Best Time to Style a Sleek Bun
Morning is ideal if you want the style to last all day. Night prep also works. Sleep with a scarf to hold the bun overnight. Reapply gel in the morning for touch-ups.
H2: Sleek Bun Kit for Different Hair Types
Straight hair needs lighter gels. Wavy hair benefits from thick hold gel. Curly hair needs strong edge control. Textured hair may need added moisture before styling. Use products that match your needs.
H2: Conclusion
You do not need a big budget to style a sleek bun. A few affordable tools are enough. Start small and build your own kit. Use quality low-cost products. Follow simple steps. Practice often. Check out SleekBun for more guides and tutorials.
H2: Frequently Asked Questions
H3: What is the best brush for sleek buns?
A bristle brush works best. It smooths the hair and spreads natural oils evenly.
H3: Can I use coconut oil in my sleek bun kit?
Yes. Coconut oil adds shine and moisture. Use a small amount to avoid a greasy look.
H3: How long will a sleek bun last?
It can last all day with the right products. Use a scarf to maintain it longer.
H3: Are these kits good for kids?
Yes. These kits are gentle and easy to use. Just choose products safe for young scalps.
H3: How do I stop gel from flaking?
Use a small amount. Choose alcohol-free formulas. Avoid layering too many products.


