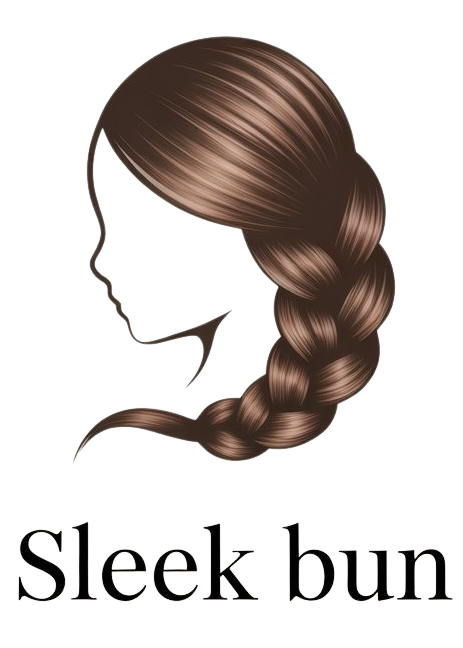
DIY Sleek Bun Using Gel and a Comb: A Complete Guide

Sleek buns are stylish and simple. They work for casual days and formal events. You do not need a salon visit. You can achieve the look at home using gel and a comb.
This guide shows every step. You will learn how to make your sleek bun neat and elegant. We include tips, benefits, and solutions to common problems.
Why Sleek Buns Are Always Trending
Sleek buns are timeless. They suit any face shape. They keep hair secure and tangle free. They highlight the face and add sophistication. From Instagram models to working moms. Everyone loves the sleek bun.
You can go from a messy hair day to a polished look. It takes a few minutes. All you need is the right method.
What You Need to Get Started
Before you start your sleek bun. Gather these tools.
- Strong hold gel
- A fine tooth comb
- Hair tie
- Bristle brush
- Edge control (optional)
- Satin scarf
- Water spray bottle
These are easy to find. You may already have them at home.
Step by Step Guide to Create a Sleek Bun Using Gel and a Comb
Step 1: Wash and Prepare the Hair
Clean hair holds better. Start with freshly washed hair. Use a sulfate free shampoo. Apply conditioner for softness. Rinse well and pat dry.
Apply leave in conditioner if needed. Detangle hair using a wide tooth comb. Let it air dry or blow dry as needed.
Step 2: Choose Your Parting Style
You can part in the middle or the side. Use the tail end of a comb. Make the line straight. Choose what flatters your face shape.
This decision changes the final look. A middle part gives a bold style. A side part softens your features.
Step 3: Spray Hair Lightly
Use a spray bottle filled with water. Mist the hair lightly. This helps the gel hold better. Do not soak the hair. Just make it damp enough.
Damp hair allows for smoother combing and shaping.
Step 4: Apply Gel to the Roots
Use a strong hold gel. Apply it from the roots to the crown. Use fingers or a brush. Cover all sides for even hold.
Work section by section. Use the comb to spread the gel deeper. This step builds the foundation of your sleek bun.
Step 5: Comb and Brush the Hair Back
Use a fine tooth comb. Start at the hairline. Comb back with even strokes. Keep your part intact.
Follow with a bristle brush. This smooths flyaways. Brush until the hair lies flat and shiny.
Step 6: Secure the Ponytail
Hold the hair where you want the bun. High or low placement both work. Tie it tightly with a hair tie.
Use both hands for control. Do not leave lumps or bumps.
Step 7: Twist and Wrap the Bun
Take the ponytail. Twist it like a rope. Wrap it around the base. Tuck the ends under the bun.
Use bobby pins to hold it. Make sure it feels firm and stable.
Step 8: Lay Your Edges (Optional)
Use edge control or gel. Smooth your baby hairs. Use a toothbrush or small brush. Create soft waves or clean swoops.
This adds style and polish.
Step 9: Set the Style with a Scarf
Wrap a satin scarf around your head. Tie it firmly but gently. Leave it for ten minutes or more.
This sets the gel. It makes the bun last all day.
Step 10: Final Touches
Remove the scarf. Use a mirror to check the back. Smooth any loose hairs. Spray light oil or shine spray for a glossy look.
Your sleek bun is now done. Enjoy the clean and chic style.
Pros and Cons of DIY Sleek Buns
| Pros | Cons |
|---|---|
| Saves money on salon visits | Can cause breakage with overuse |
| Takes only 10 to 15 minutes | Needs daily touch ups sometimes |
| Works on any hair type | Some gels cause flakes |
| Suitable for all occasions | Not ideal for wet weather |
| Enhances facial features | May require strong hold products |
How to Maintain a Sleek Bun for Long Hours
Use high hold gel. Avoid touching the bun during the day. Wrap your head if you nap. Do not let humidity affect the look. Use hairspray for extra control.
Reapply edge control if needed. Keep your brush and gel nearby.
Best Gels for Long Lasting Sleek Buns
Some gels offer better hold than others. Look for alcohol free formulas. These do not dry out your hair.
Try these types
- Eco Styler Olive Oil Gel
- Got2B Glued Gel
- Gorilla Snot Gel
- Shine N Jam Conditioning Gel
Test small amounts first. Choose what suits your hair best.
Comb Tips for Perfect Smoothing
Use a rat tail comb for parting. Choose a fine tooth comb for smoothing. Avoid rough plastic combs. They can cause breakage.
Wooden combs reduce static. Bristle brushes help flatten the surface.
Adding Accessories to Your Sleek Bun
You can elevate your look with hair pins. Use pearls, clips, or metallic pins. Add a headband for a bold touch.
Flowers or beads give a soft finish. Choose according to the event.
Mistakes to Avoid
- Using too much gel. This causes build up
- Skipping the brushing. This creates bumps
- Not tying down the hair. The gel does not set properly
- Combing dry hair. This leads to breakage
- Using low quality tools. This reduces sleekness
Avoiding these mistakes gives better results. A perfect sleek bun starts with smart steps.
Sleek Bun Styles You Can Try
H3: Low Sleek Bun
This sits at the nape of the neck. It is elegant and simple. Great for weddings and office looks.
H3: High Sleek Bun
This sits near the crown. It lifts the face. It creates a bold and youthful style.
H3: Braided Sleek Bun
Make a braid with the ponytail. Wrap it into a bun. Adds texture to the basic style.
H3: Sleek Bun With Middle Part
This creates symmetry. It draws attention to the center of your face.
H3: Sleek Bun With Side Part
This gives a soft and romantic look. Great for round or heart shaped faces.
For more ideas on trending sleek bun styles visit SleekBun.
Hair Types That Work Best with Sleek Buns
Sleek buns work for all hair types. Straight hair holds with less gel. Curly hair needs more control. Coily hair requires firm brushing and gel.
No matter your hair type. You can achieve a smooth look with the right method.
Prepping Natural Hair for a Sleek Bun
Apply leave in conditioner. Use a lightweight oil. Detangle well. Stretch your curls using heat or braiding before styling.
Use edge control and a scarf to tame your edges. Natural hair shines beautifully in a sleek bun.
Sleek Bun for Short Hair
Yes. Short hair can rock sleek buns too. Use a bun extension or drawstring bun. Slick your own hair back and attach the extension.
This creates a full and flawless look.
DIY Sleek Bun for Kids
Use mild gel. Avoid tight buns. Keep the style low for comfort. Add fun clips or bows.
Sleek buns are great for school and family photos.
5 FAQs About DIY Sleek Buns
H4: How long does a sleek bun last?
It can last all day. Sleep with a scarf to keep it overnight. Refresh the edges in the morning.
H4: Can I do a sleek bun on wet hair?
Damp hair is best. Fully wet hair may not hold shape well. Avoid dripping wet hair.
H4: Is gel bad for my hair?
Too much gel can cause dryness. Use alcohol free gel. Wash your hair after styling.
H4: What should I do if my hair keeps puffing up?
Apply more gel. Wrap your head with a scarf for 15 minutes. Use hairspray if needed.
H4: Can I do a sleek bun every day?
Yes. But give your hair breaks. Deep condition weekly to avoid dryness or breakage.
Final Thoughts
Creating a sleek bun at home is simple and effective. You need gel. You need a comb. You need a few minutes of care. This style works for workdays or weddings.
With practice. You can create a neat sleek bun anytime. Avoid common mistakes. Use the right tools. Add your personal twist with accessories.
For more tutorials and trending styles visit SleekBun. Get inspired and try new looks.


